Trino对接haproxy开启ssl
1、背景
客户在开启https后,在高并发的情况下,集群性能下降严重。初步估计是由于worker和Coordinator交互都需要进行加密和解密,会提高cpu使用率,导致服务变慢。现在采用haproxy作为load balancer开启https,转发到trino http
2、操作步骤
2.1、安装haproxy
环境:centos7.9
yum install haproxy -y
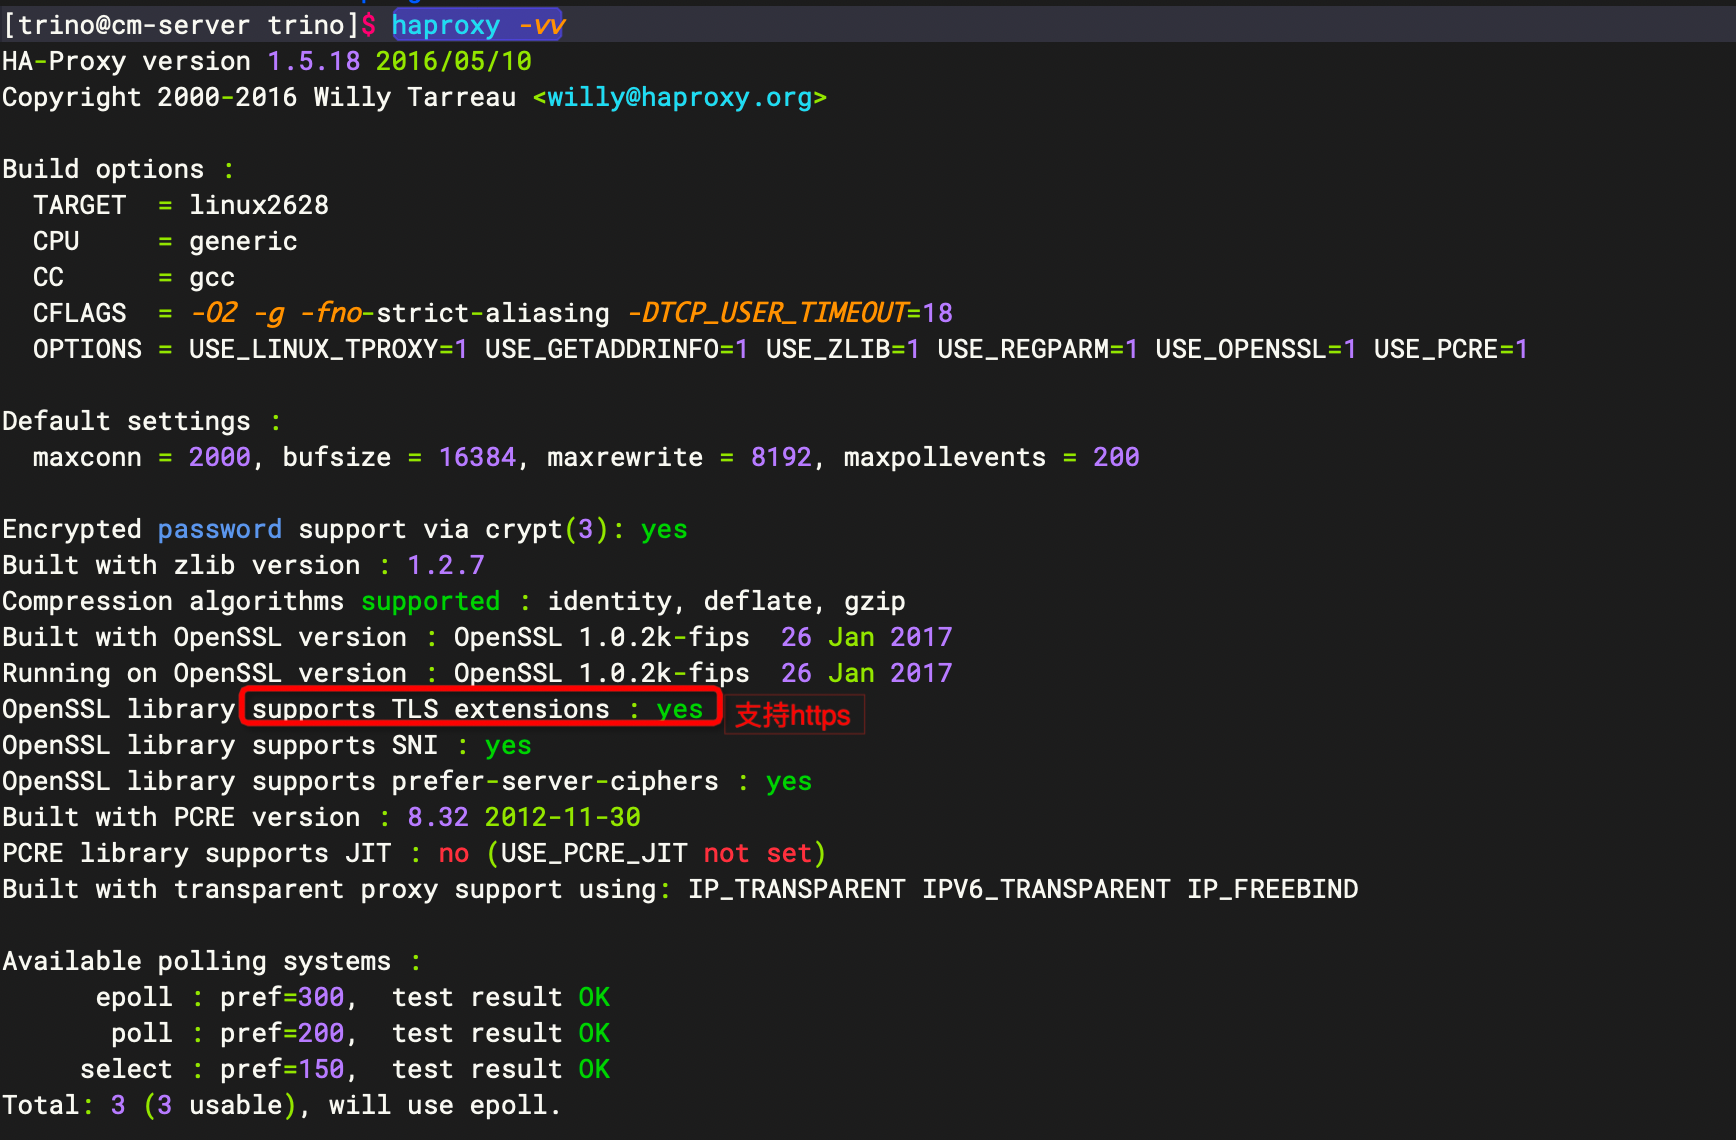
检测是否支持https
haproxy -vv
2.2、生成ssl证书
1、创建私钥
openssl genpkey -algorithm RSA -out haproxy.key
2、创建证书签名请求(CSR)
openssl req -new -sha256 -key haproxy.key -out haproxy.csr   -subj "/C=CN/ST=Shanghai/L=Shanghai/O=Organization/OU=Unit/CN=fzcn.org"
3、创建扩展配置文件(extfile.cnf)
vim extfile.cnf
[ v3_req ]
subjectAltName=DNS:cm-server.open.hadoop,IP:172.16.121.6
4、生成带有扩展的证书
openssl x509 -req -days 3650 -in haproxy.csr -signkey haproxy.key -out haproxy.crt  -extfile extfile.cnf -extensions v3_req
5、将证书和私钥合并到一个PEM文件
cat haproxy.crt haproxy.key > haproxy.pem
6、导出证书crt
openssl x509 -in haproxy.pem -out haproxy.crt
7、创建PKCS12文件(输入的密码默认为admin@123)
openssl pkcs12 -export -in haproxy.crt -inkey haproxy.key -out haproxy.p12
8、将PKCS12转换为JKS(输入的密码默认为admin@123)
keytool -importkeystore -srckeystore haproxy.p12 -srcstoretype PKCS12 -destkeystore haproxy.jks -deststoretype JKS
查看jks证书
keytool -list -v -keystore haproxy.jks -storepass admin@123
2.3、配置haproxy
在/etc/haproxy/haproxy.cfg
#---------------------------------------------------------------------
# Example configuration for a possible web application.  See the
# full configuration options online.
#
#   http://haproxy.1wt.eu/download/1.4/doc/configuration.txt
#
#---------------------------------------------------------------------

#---------------------------------------------------------------------
# Global settings
#---------------------------------------------------------------------
global
    # to have these messages end up in /var/log/haproxy.log you will
    # need to:
    #
    # 1) configure syslog to accept network log events.  This is done
    #    by adding the '-r' option to the SYSLOGD_OPTIONS in
    #    /etc/sysconfig/syslog
    #
    # 2) configure local2 events to go to the /var/log/haproxy.log
    #   file. A line like the following can be added to
    #   /etc/sysconfig/syslog
    #
    #    local2.*                       /var/log/haproxy.log
    #
    log         127.0.0.1 local2

    chroot      /var/lib/haproxy
    pidfile     /var/run/haproxy.pid
    maxconn     4000
    user        haproxy
    group       haproxy
    daemon


    # turn on stats unix socket
    stats socket /var/lib/haproxy/stats
    tune.ssl.default-dh-param 2048
    nbproc 4

    cpu-map 1 0
    cpu-map 2 1
    cpu-map 3 2
    cpu-map 4 3
    stats bind-process 4
#---------------------------------------------------------------------
# common defaults that all the 'listen' and 'backend' sections will
# use if not designated in their block
#---------------------------------------------------------------------
defaults
    log                     global
    option                  httplog
    option                  dontlognull
    option http-server-close
    option forwardfor       except 127.0.0.0/8
    option                  redispatch
    retries                 3
    timeout http-request    10s
    timeout queue           1m
    timeout connect         10s
    timeout client          1m
    timeout server          1m
    timeout http-keep-alive 10s
    timeout check           10s
    maxconn                 3000

#---------------------------------------------------------------------
# main frontend which proxys to the backends
#---------------------------------------------------------------------

frontend https_frontend
   bind *:18082 ssl crt /opt/haproxy/extssl/haproxy.pem
   mode http
   #option httpclose
   option forwardfor
   reqadd X-Forwarded-Proto:\ https
   default_backend web_server
   bind-process 1 2 3
backend web_server
  mode http
  option http-server-close
  balance roundrobin
  cookie SERVERID insert indirect nocache
  server s1 172.16.121.6:18081 check cookie s1 inter 15s fastinter 15s downinter 15s rise 2 fall 4

# static backend for serving up images, stylesheets and such
#---------------------------------------------------------------------
# round robin balancing between the various backends
#---------------------------------------------------------------------
listen admin_stats
        stats   enable
        bind    *:8080    #监听的ip端口号
        mode    http    #开关
        option  httplog
        log     global
        maxconn 10
        stats   refresh 30s   #统计页面自动刷新时间
        stats   uri /admin    #访问的uri   ip:8080/admin
        stats   realm haproxy
        stats   auth admin:admin  #认证用户名和密码
        stats   hide-version   #隐藏HAProxy的版本号
        stats   admin if TRUE   #管理界面,如果认证成功了,可通过webui管理节点
修改frontend 中的/opt/haproxy/extssl/haproxy.pem 为上边生成的证书的路径
修改backend 172.16.121.6:18081 为实际Coordinator的http地址
添加日志
在/etc/rsyslog.conf添加以下内容
#添加
local2.*                                                /var/log/haproxy.log #这个local2要和haproxy.cfg中的log字段配置的相同
#搜索message,将其中的info删掉,不然haproxy的日志也会写到message中
mail.none;authpriv.none;cron.none                /var/log/messages
$ModLoad imudp
$UDPServerRun 514
重启rsyslog
systemctl restart rsyslog
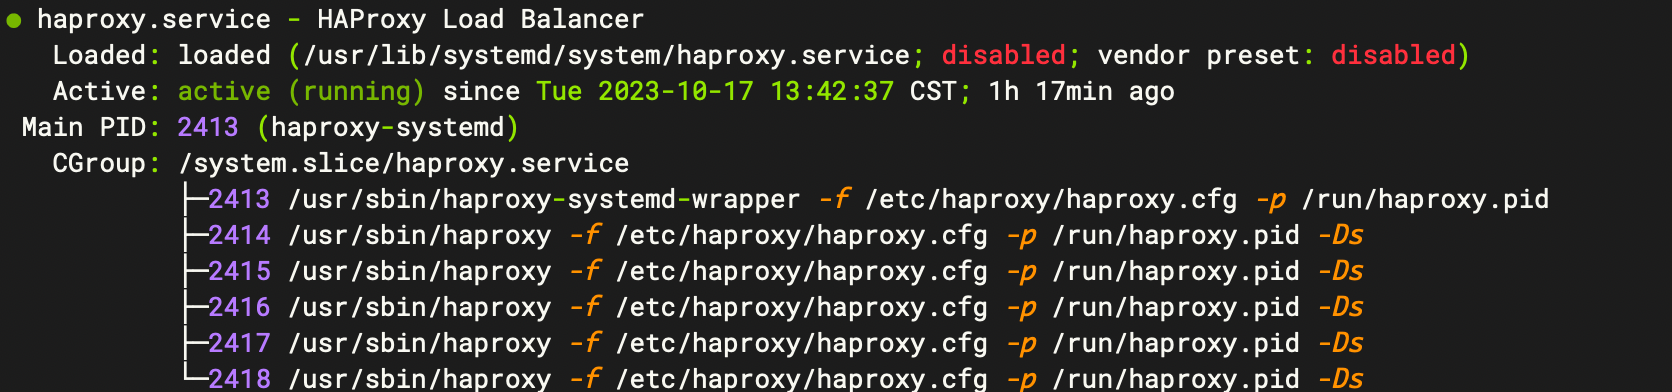
重启haproxy
systemctl start haproxy && systemctl enable haproxy && systemctl status haproxy
启动成功的状态
2.4、Trino添加配置
在config.properties添加配置
internal-communication.shared-secret=abc123
http-server.process-forwarded=true
##添加ldap配置
http-server.authentication.type=PASSWORD
password-authenticator.properties
password-authenticator.name=ldap
ldap.url=ldap://172.16.105.69:389
#多ou,使用:作为分隔符
ldap.user-base-dn=CN=Users,DC=fzcdh,DC=com:OU=owner1,DC=fzcdh,DC=com
ldap.user-bind-pattern=${USER}@fzcdh.com
ldap.allow-insecure=true
重启trino 服务
3、测试验证
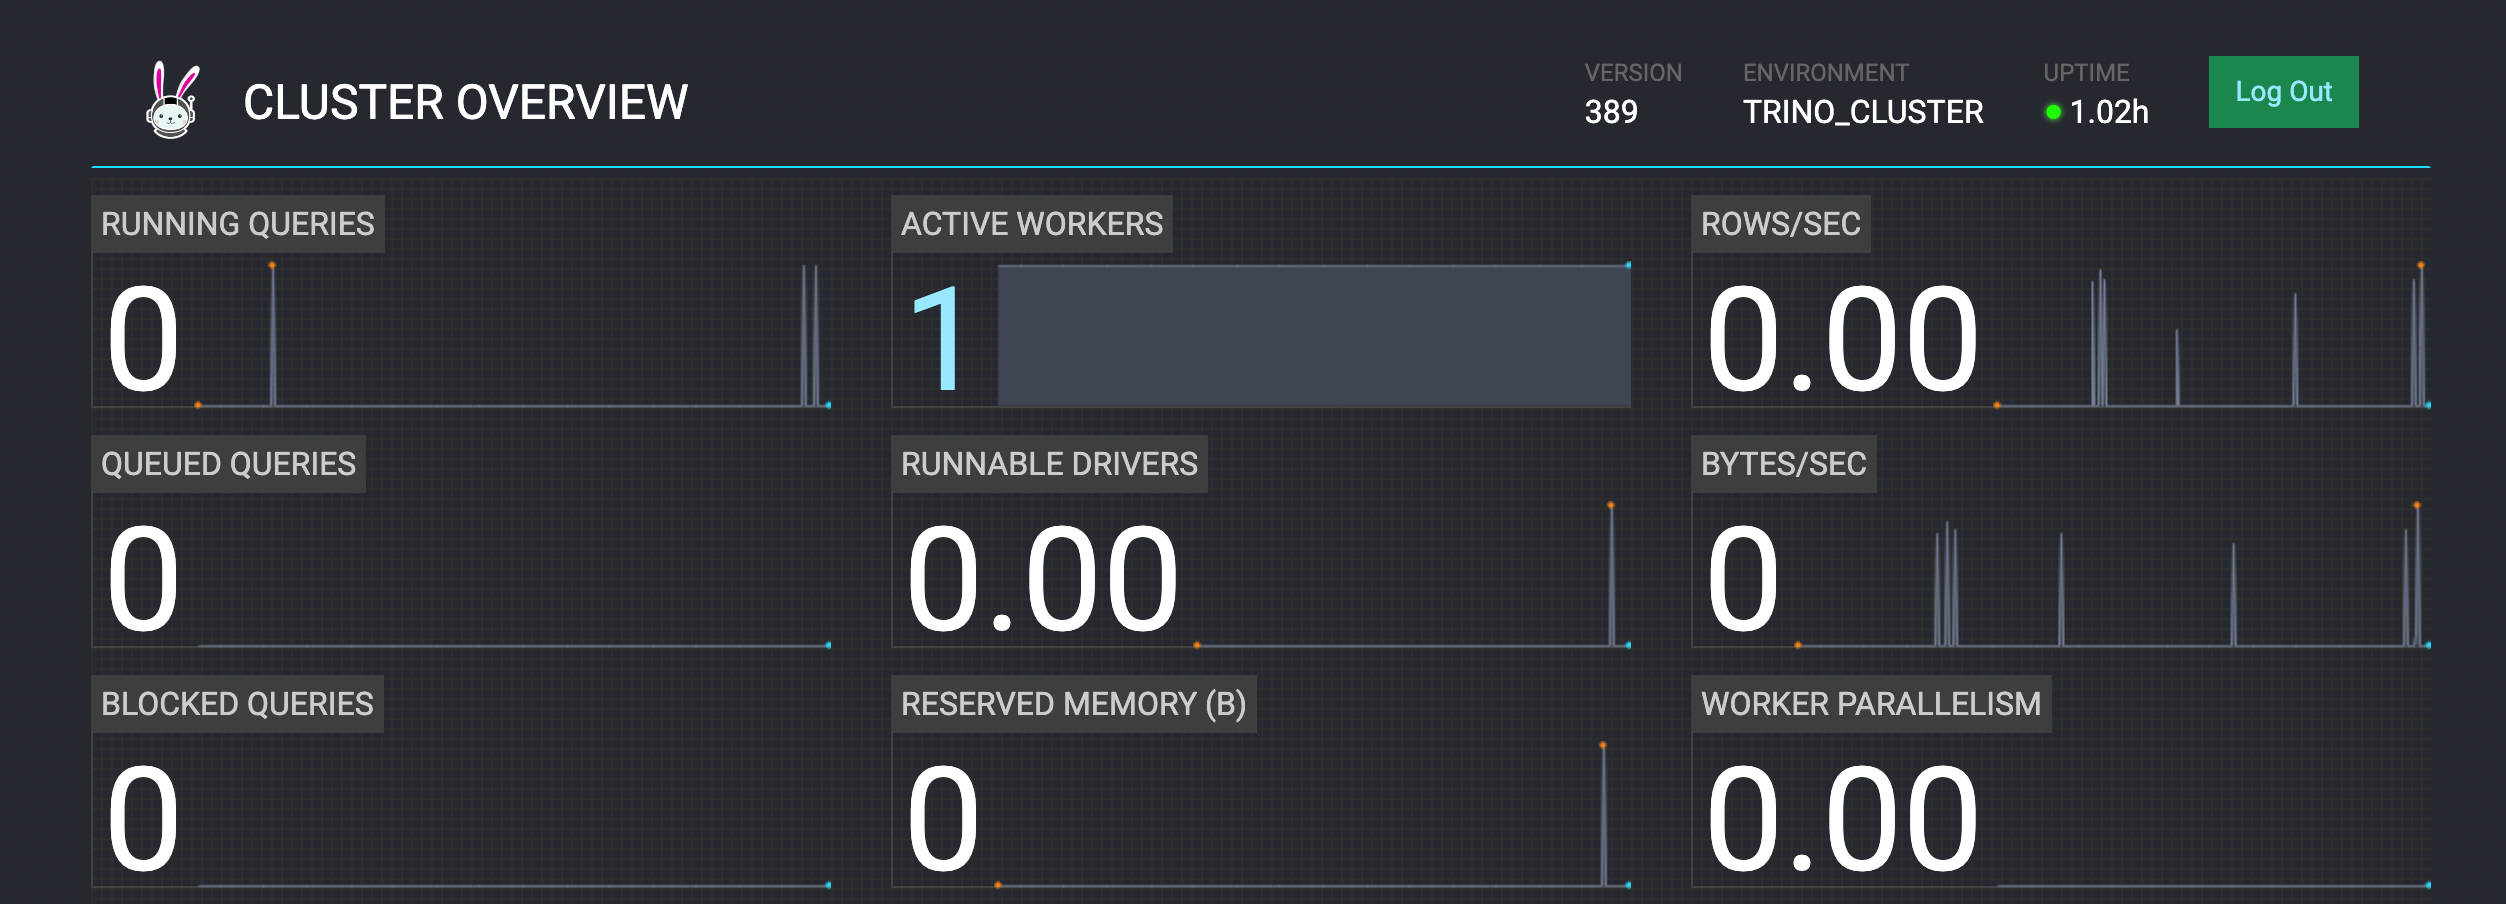
3.1、 登录web页面
查看worker 是否注册成功
https://172.16.121.6:18082/ui/
3.2、使用trino client
trino-cli --server https://172.16.121.6:18082 --keystore-path /opt/haproxy/extssl/haproxy.jks --keystore-password admin@123 --catalog hive --user test --password
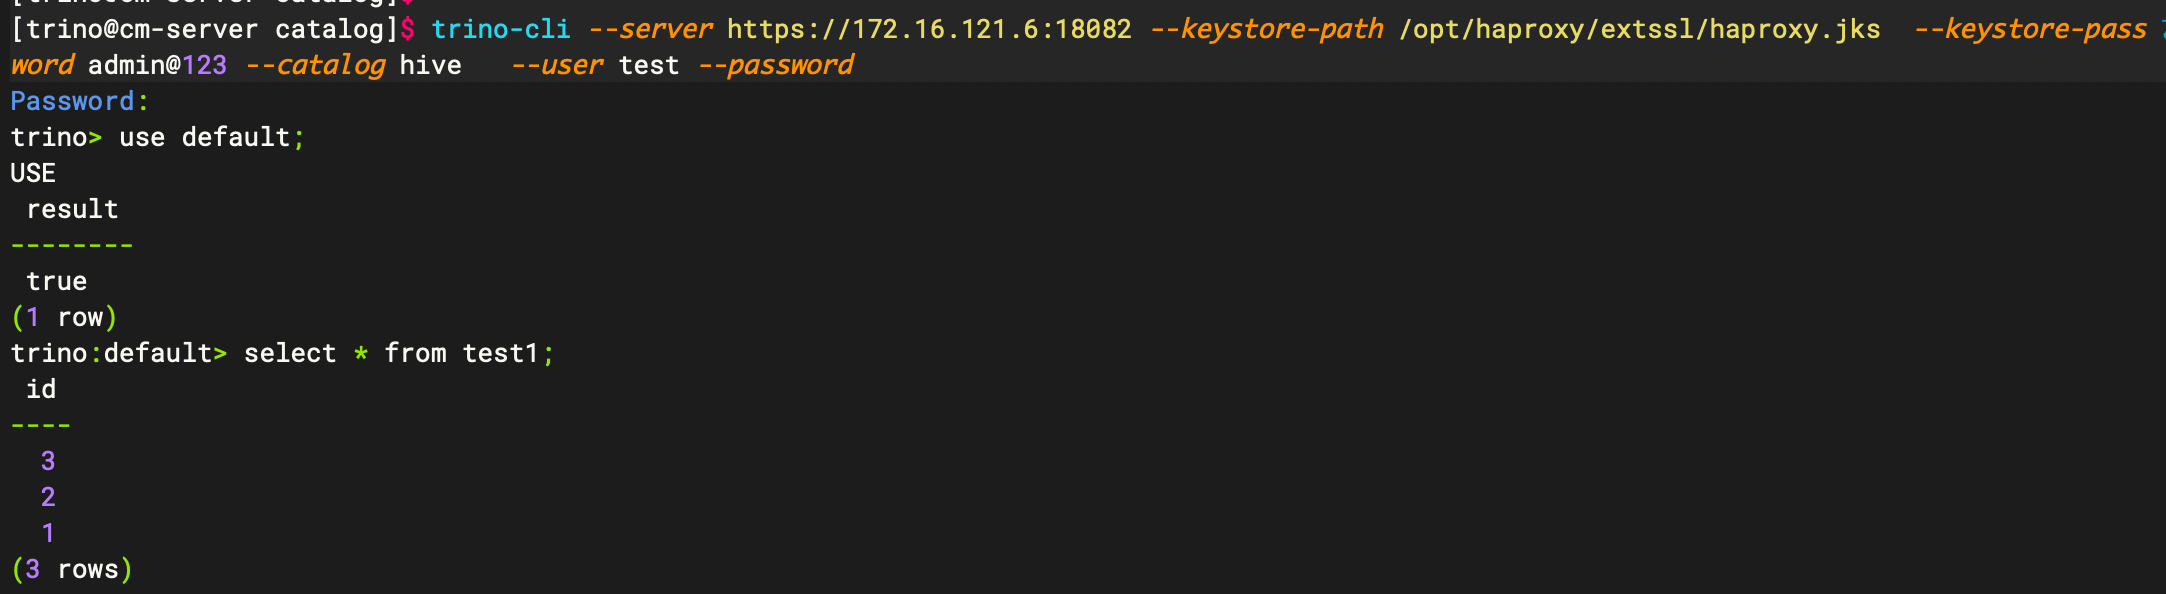
其中此--keystore-path为前面生成的jks文件 --keystore-password 为jks的密码(默认为admin@123)
--user test --password 指集成了ldap中存储的用户密码
(如何集成ldap请看文档Trino 对接ldap)
3.3、python代码测试
from trino import dbapi
from trino.auth import BasicAuthentication

# 依赖
# python 3.11.5
# trino

# 连接到Trino集群
# user = "test",
# pwd = "ranger123",
conn = dbapi.connect(
    # host='172.16.121.6',
    host='cm-server.open.hadoop',
    # user="test",
    auth=BasicAuthentication("test", "ranger@123"),
    http_scheme="https",
    verify=False,
    # host='hd1.dtstack.com',
    port=18082,
    # user='test',
    catalog='hive',
    schema='default'
)

# 创建游标对象
cursor = conn.cursor()

# 执行查询
cursor.execute('SELECT count(*) FROM test1')

# 获取查询结果
results = cursor.fetchall()

# 处理查询结果
for row in results:
    print(row)

# 关闭连接
cursor.close()
conn.close()