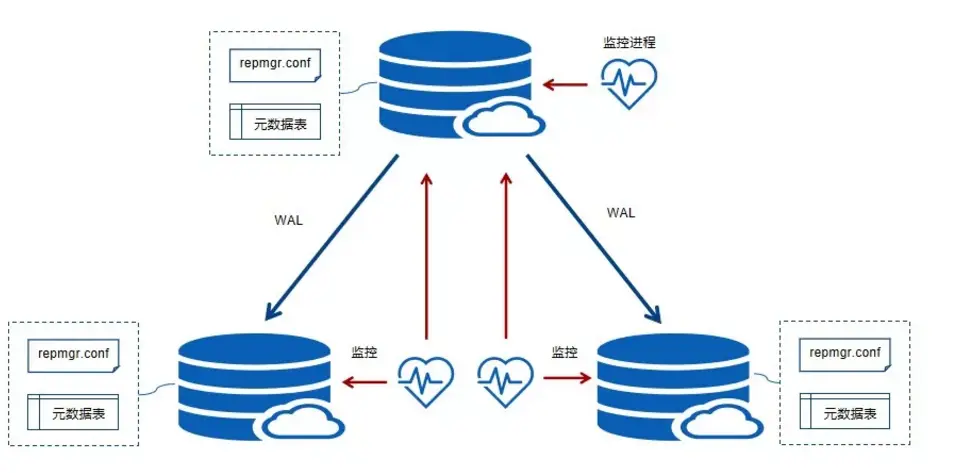
PG的执行计划
一、Explain基本使用
1.1 命令解释
explain [ ( option [,...] ) ] statement
explain [ analyze ] [ verbose ] statement

option选项有:
analyze [ boolean ]                     //会实际执行SQL,并返回SQL实际执行的相关统计信息
verbose [ boolean ]                     //显示执行计划的附加信息
costs [ boolean ]                       //默认开启,显示每个计划节点的启动成本、总成本,预计返回行数,预估返回结果集每行平均宽度
buffers [ boolean ]                     //显示缓冲区使用信息
format [ text | xml | json | yaml ]     //执行计划执行输出格式
1.2 explain结果输出解释
执行计划示例:
db1=# explain (analyze 1,verbose 1,costs 1,buffers 1) select * from t3 where name='aa';
                                             QUERY PLAN
----------------------------------------------------------------------------------------------------
 Seq Scan on public.t3  (cost=0.00..1.10 rows=1 width=70) (actual time=0.007..0.008 rows=2 loops=1)
   Output: id, name, gmt_create
   Filter: ((t3.name)::text = 'aa'::text)
   Rows Removed by Filter: 6
   Buffers: shared hit=1
 Planning Time: 0.139 ms
 Execution Time: 0.020 ms
(7 rows)
结果输出解释:
 Seq Scan on public.t3                      //seq scan表示全表扫描
 (cost=0.00..1.10 rows=1 width=70)          //以".."为分隔符,前面表示启动的成本,后面表示返回结果集第一行记录的成功,rows表示预估结果集行数,width表示预估结果集每行的宽度
 (actual time=0.007..0.008 rows=2 loops=1)  //当analyze设置为true时,会输出SQL实际执行后的相关资源消耗信息,分别时启动时间,返回结果集花费时间,返回结果集行数
 Output: id, name, gmt_create               //当verbose为true时,输出查询字段
 Filter: ((t3.name)::text = 'aa'::text)     //过滤条件
 Buffers: shared hit=1                      //当buffers为true时,输出缓冲区命中代价,共读取共享内存中的一个数据块,
 Planning Time: 0.139 ms
 Execution Time: 0.020 ms
二、扫描数据方式
2.1 全表扫描
全表扫描也成为顺序扫描,在执行计划中以" Seq Scan "为标识。全表扫描就是把该表所有的数据块从头到尾顺序读一遍。
db1=# explain (analyze 1,verbose 1,costs 1,buffers 1) select * from t3 where name='ff';
                                               QUERY PLAN
---------------------------------------------------------------------------------------------------------
 Seq Scan on public.t3  (cost=0.00..18.30 rows=225 width=15) (actual time=0.011..0.117 rows=225 loops=1)
   Output: id, name, gmt_create
   Filter: ((t3.name)::text = 'ff'::text)
   Rows Removed by Filter: 759
   Buffers: shared hit=6
 Planning Time: 0.057 ms
 Execution Time: 0.137 ms
(7 rows)
2.2 索引扫描
索引扫描是为了加快查询数据的效率而设计的,在执行计划中以" Index Scan using ${index_name} "为标识。索引优先通过对索引的扫描找出所需要记录的物理位置,然后在回表查询需要的字段。
db1=# explain (analyze 1,verbose 1,costs 1,buffers 1) select * from t3 where name='ww';
                                                       QUERY PLAN
------------------------------------------------------------------------------------------------------------------------
 Index Scan using idx_t3_name on public.t3  (cost=0.28..8.29 rows=1 width=15) (actual time=0.043..0.043 rows=0 loops=1)
   Output: id, name, gmt_create
   Index Cond: ((t3.name)::text = 'ww'::text)
   Buffers: shared hit=1 read=1
 Planning Time: 0.065 ms
 Execution Time: 0.056 ms
(6 rows)
2.3 位图扫描
位图索引也是走索引的一种方式,在执行计划中以" Bitmap Heap Scan "为标识。扫描索引并将满足条件的行或块在内存中创建一个位图,等索引扫描完毕后再根据位图到表的数据文件中把相应的数据读取出来。如果走了两个索引可以根据实际情况将索引形成为位图做“or”、“and”计算,合并成一个位图,再到表的数据文件中把数据读取出来。
db1=# explain (analyze 1,verbose 1,costs 1,buffers 1) select * from t3 where name='gg';
                                                       QUERY PLAN
------------------------------------------------------------------------------------------------------------------------
 Bitmap Heap Scan on public.t3  (cost=5.27..12.89 rows=129 width=15) (actual time=0.048..0.064 rows=129 loops=1)
   Output: id, name, gmt_create
   Recheck Cond: ((t3.name)::text = 'gg'::text)
   Heap Blocks: exact=6
   Buffers: shared hit=7 read=1
   ->  Bitmap Index Scan on idx_t3_name  (cost=0.00..5.24 rows=129 width=0) (actual time=0.042..0.042 rows=129 loops=1)
         Index Cond: ((t3.name)::text = 'gg'::text)
         Buffers: shared hit=1 read=1
 Planning Time: 0.059 ms
 Execution Time: 0.085 ms
(10 rows)
2.4 条件过滤
当需要将扫描的结果集进行条件过滤时,在执行计划中以" Filter: (conditions) "为标识,过滤是否走索引还需要看具体情况。
db1=# explain (analyze 1,verbose 1,costs 1,buffers 1) select * from t3 where name='ww' and gmt_create<now();
                                                       QUERY PLAN
------------------------------------------------------------------------------------------------------------------------
 Index Scan using idx_t3_name on public.t3  (cost=0.28..8.30 rows=1 width=15) (actual time=0.013..0.013 rows=0 loops=1)
   Output: id, name, gmt_create
   Index Cond: ((t3.name)::text = 'ww'::text)
   Filter: (t3.gmt_create < now())
   Buffers: shared hit=2
 Planning Time: 0.080 ms
 Execution Time: 0.024 ms
(7 rows)
三、表关联方式
3.1 NestLoop join
嵌套循环中外表驱动内表,对于满足条件的外表记录,逐一在内表中进行关联匹配。对于嵌套巡检,外表尽量要小,且内表的表关联字段要保证存在有效索引。
db1=# explain select * from t3 join t4 on t3.name=t4.name where t4.name='ww';
                                 QUERY PLAN
-----------------------------------------------------------------------------
 Nested Loop  (cost=0.28..17.40 rows=1 width=30)
   ->  Index Scan using idx_t3_name on t3  (cost=0.28..8.29 rows=1 width=15)
         Index Cond: ((name)::text = 'ww'::text)
   ->  Seq Scan on t4  (cost=0.00..9.10 rows=1 width=15)
         Filter: ((name)::text = 'ww'::text)
(5 rows)
3.2 Hash join
选择表关联中的小表,在内存中对表关联字段创建散列表,然后扫描较大的表做散列探测散列表,找出与散列表匹配的记录。当表相对比较小时可直接将小表全部放至内存中,若内存无法放下,优化器会将它切割为若干段不同的分区,把不能放入内存的部分写入磁盘的临时段,此时需要有较大的临时段以便尽量提高IO性能。
db1=# explain select * from t3 join t4 on t3.name=t4.name where t4.id>300;
                            QUERY PLAN
------------------------------------------------------------------
 Hash Join  (cost=28.14..360.84 rows=27026 width=30)
   Hash Cond: ((t4.name)::text = (t3.name)::text)
   ->  Seq Scan on t4  (cost=0.00..9.10 rows=188 width=15)
         Filter: (id > 300)
   ->  Hash  (cost=15.84..15.84 rows=984 width=15)
         ->  Seq Scan on t3  (cost=0.00..15.84 rows=984 width=15)
(6 rows)
3.3 Merge join
通常情况下hash join的效果要比merge join好,当源数据上有索引,或者结果已被排过序,在执行排序合并连接时就不需要排序了,这种情况下merge join的效果要优于hash join。
db2=# explain select * from t1 join t2 on t1.id=t2.id;
                                QUERY PLAN
---------------------------------------------------------------------------
 Merge Join  (cost=4.60..9.07 rows=80 width=14)
   Merge Cond: (t1.id = t2.id)
   ->  Index Scan using t1_pkey on t1  (cost=0.28..34.74 rows=898 width=7)
   ->  Sort  (cost=4.33..4.53 rows=80 width=7)
         Sort Key: t2.id
         ->  Seq Scan on t2  (cost=0.00..1.80 rows=80 width=7)
(6 rows)