Hudi集成Spark
环境准备
安装Spark
1)Hudi支持的Spark版本
Hudi | Supported Spark 3 version |
0.12.x | 3.3.x,3.2.x,3.1.x |
0.11.x | 3.2.x(default build, Spark bundle only),3.1.x |
0.10.x | 3.1.x(default build), 3.0.x |
0.7.0-0.9.0 | 3.0.x |
0.6.0 and prior | Not supported |
# 拷贝编译好的包到spark的jars目录

cp /opt/hudi-0.12.0/packaging/hudi-spark-bundle/target/hudi-spark3.2-bundle_2.12-0.12.0.jar /opt/spark-3.2.2/jars

# 不自己编译,去maven里面下载对应版本的jar包放到spark的jars目录下也可以
https://search.maven.org/artifact/org.apache.hudi/hudi-spark3.3-bundle_2.12/0.13.1/jar
Spark SQL方式
创建表
1)启动spark-sql
spark-sql \
  --master yarn --deploy-mode client \
  --conf 'spark.serializer=org.apache.spark.serializer.KryoSerializer' \
  --conf 'spark.sql.catalog.spark_catalog=org.apache.spark.sql.hudi.catalog.HoodieCatalog' \
  --conf 'spark.sql.extensions=org.apache.spark.sql.hudi.HoodieSparkSessionExtension'

2)创建分区表
# 创建一个cow分区外部表,指定primaryKey和preCombineField

create table spark_hudi (
    id int, name string,price double, ts bigint
) using hudi
tblproperties (type = 'cow', primaryKey = 'id', preCombineField = 'ts');

3)向分区表插入数据
# 默认情况下,如果提供了preCombineKey,则insert into的写操作类型为upsert,否则使用insert。

insert into spark_hudi select 1, 'a1', 20, 1000;

4)时间旅行查询
# 修改id为1的数据

insert into spark_hudi select 1, 'a1_1', 20,1000;

# 再基于第一次提交时间进行时间旅行查询

select * from spark_hudi timestamp as of '20231126202835692' where id = 1;

# 再次查询会发现查询结果为第一次插入的数据

5)update
# 更新操作需要指定preCombineField

update spark_hudi set price = price * 2, ts = 1111 where id = 1;

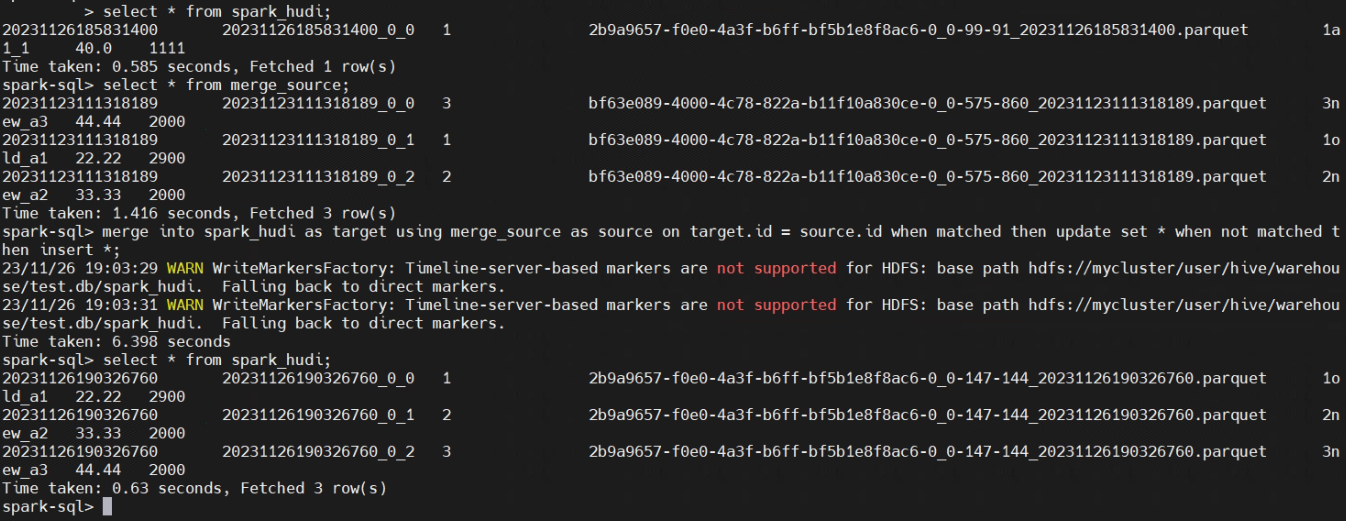
6)执行mergeinto
# 准备source表并插入数据

create table merge_source (
   id int, name string, price double, ts bigint
) using hudi
tblproperties (primaryKey = 'id', preCombineField = 'ts');

insert into merge_source values (1, "old_a1", 22.22, 2900), (2, "new_a2", 33.33, 2000), (3, "new_a3", 44.44, 2000);

merge into spark_hudi
  as target using merge_source as source
  on target.id = source.id
  when matched then update
  set * when not matched then insert *;
7)执行delete
delete from spark_hudi where id = 1;

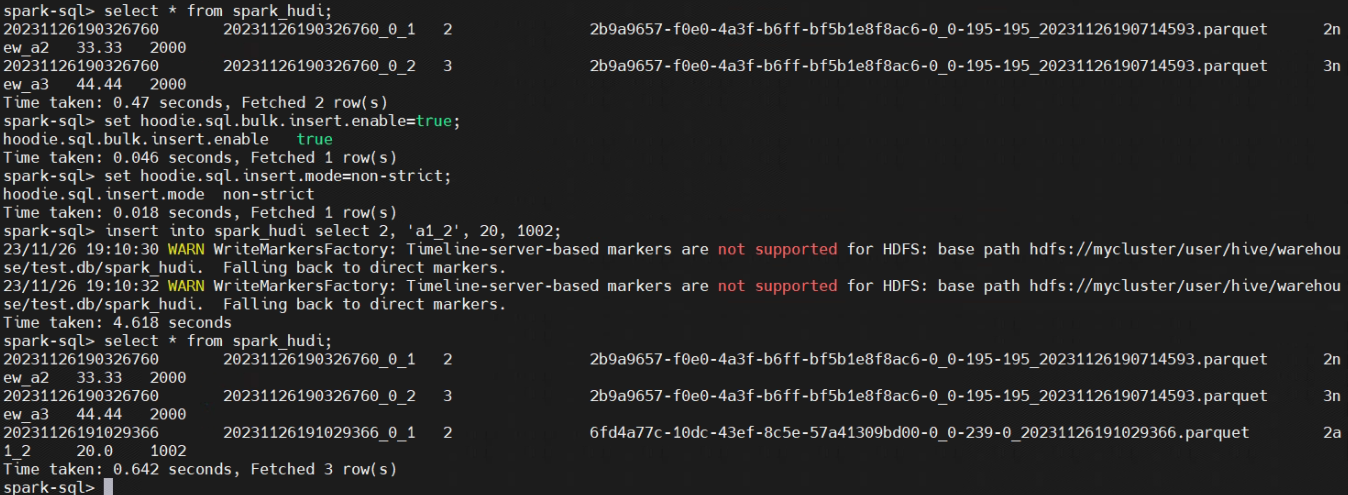
8)执行bulk_insert
set hoodie.sql.bulk.insert.enable=true;
set hoodie.sql.insert.mode=non-strict;
insert into spark_hudi select 2, 'a1_2', 20, 1002;
